← 心拍のつなぎかたへAll connection routes
HEART RATE SETUP
はじめての心拍設定(Pulsoid Desktop)Heart Rate Setup for Beginners (Pulsoid Desktop)
心拍計を買ったけど、VRChatにどう繋げばいいの? — という人のための、いちばんかんたんな手順です。スマホもIPアドレスも使いません。所要10分。
Got a heart rate monitor but no idea how to connect it to VRChat? This is the easiest route. No smartphone, no IP addresses. About 10 minutes.
0用意するものWhat you need
- Bluetooth対応の心拍計 — 例: Polar H10 / COOSPO HW9 / Mi Bandシリーズ(Mi Bandはバンド本体の「設定 → 心拍数を共有」をON)。対応機種はPulsoidの対応デバイス一覧で確認できます
- BluetoothのあるPC — 無ければUSBのBluetoothアダプタ(1,000円前後)を挿せばOK
- PulsoidのBROプラン(または14日間の無料体験 — STEP 1参照)
- PIXEL PULSEを入れたアバター(導入はこちら)
スマートウォッチ(Apple Watch等)派の人は手順が変わります(つなぎかた一覧参照)。このページはBluetooth心拍計+PCの、いちばん確実なルートだけを説明します。
- A Bluetooth heart rate monitor — e.g. Polar H10 / COOSPO HW9 / Mi Band series (on the Mi Band, turn on "Share heart rate" in the band's own settings). See Pulsoid's supported devices
- A PC with Bluetooth — no built-in Bluetooth? A cheap USB Bluetooth adapter works fine
- Pulsoid's BRO plan (or the 14-day free trial — see STEP 1)
- An avatar with PIXEL PULSE installed (setup guide)
Smartwatch users (Apple Watch etc.) need a different route (see all routes). This page covers only the most reliable path: a Bluetooth monitor + your PC.
1Pulsoidのアカウントを作るCreate a Pulsoid account
pulsoid.net を開いて、アカウントを作ります。Twitch / Google / Discordのアカウントでもメールでも登録できます。
Open pulsoid.net and create an account. You can sign up with Twitch / Google / Discord or email.
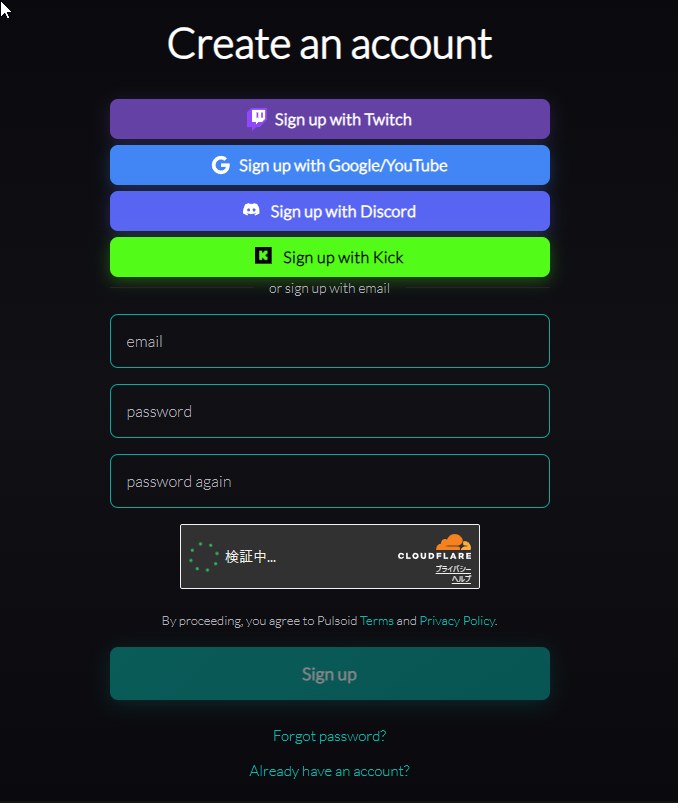
アカウント作成は無料です。ただしSTEP 4で使う「VRChat OSC」送信にはBROプランが必要です — ダッシュボードから14日間の無料体験を有効化するか、加入してください。
Creating the account is free, but the "VRChat OSC" sender used in STEP 4 needs the BRO plan — activate the 14-day free trial from the dashboard, or subscribe.
2Pulsoid for Desktop を入れるInstall Pulsoid for Desktop
Pulsoid for Desktopのページから「Download for Windows」でダウンロードして、インストールします。
Download it from the Pulsoid for Desktop page (“Download for Windows”) and install.
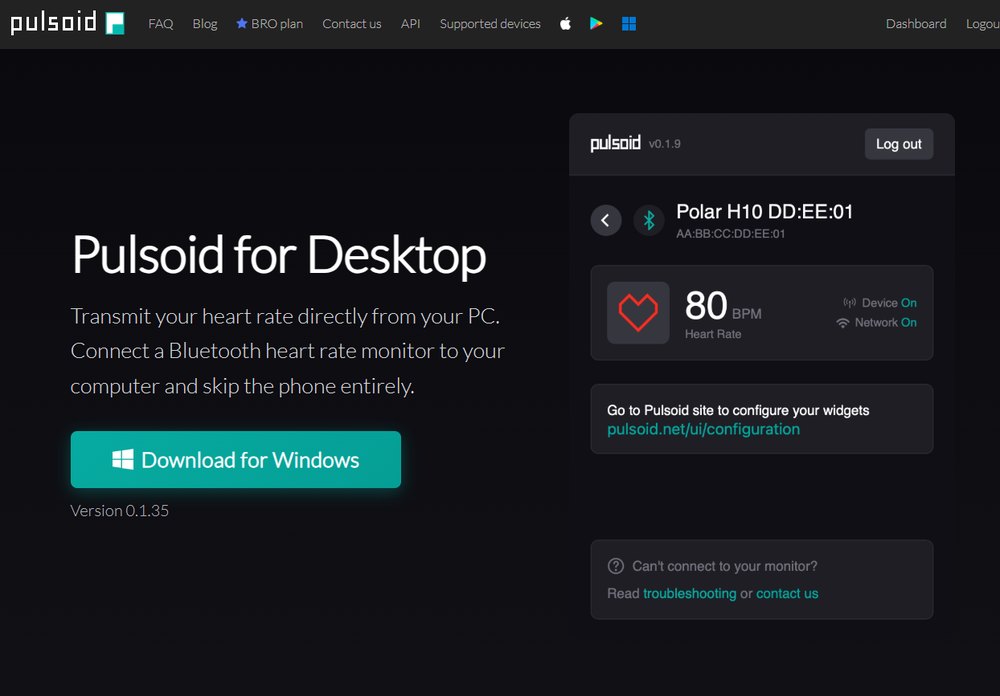
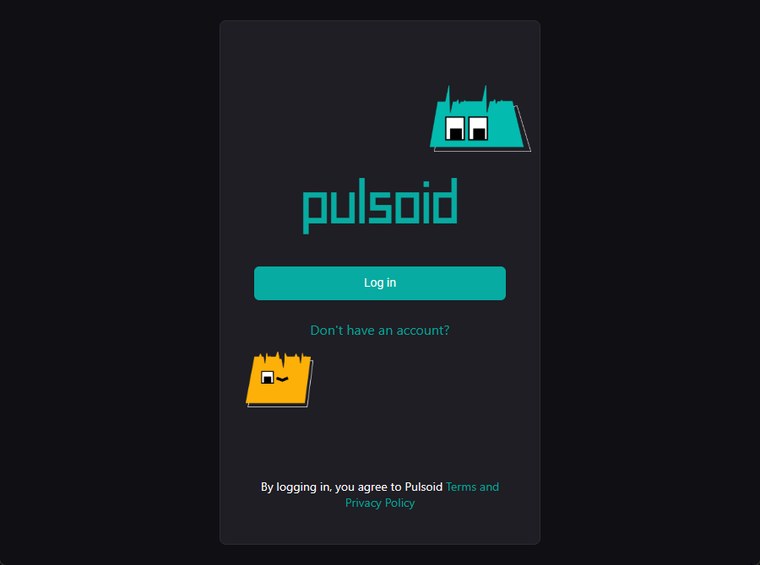
起動したら「Log in」を押して、STEP 1で作ったアカウントでログインします(ブラウザが開きます)。
Launch it, press “Log in” and sign in with the account from STEP 1 (your browser opens).
3心拍計とつなぐConnect your monitor
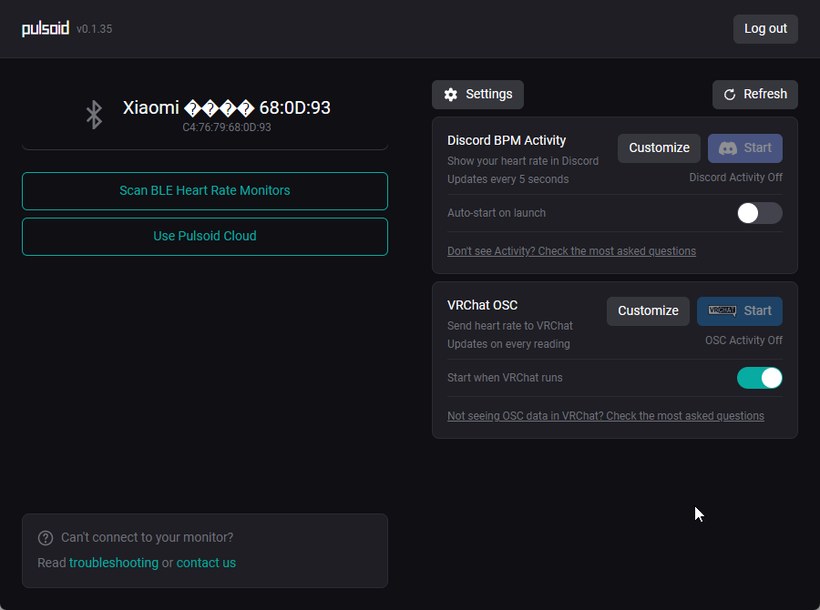
- 心拍計を体に装着します
- Pulsoid Desktopの「Scan BLE Heart Rate Monitors」を押します
- 上に出てきた自分の心拍計をクリックします
- Put on your heart rate monitor
- Press “Scan BLE Heart Rate Monitors” in Pulsoid Desktop
- Click your monitor when it appears at the top
4「VRChat OSC」がRunningか確認するCheck that “VRChat OSC” is Running
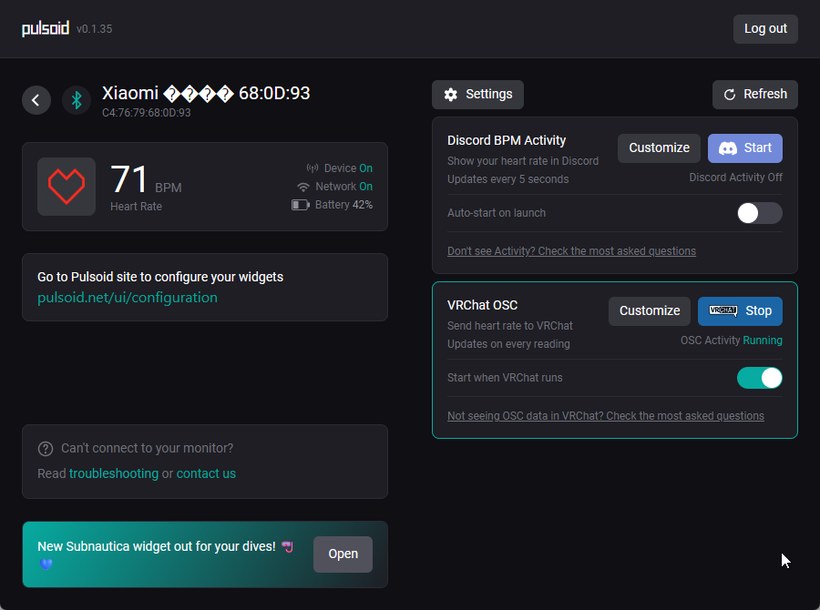
Pulsoid Desktopの右側にある「VRChat OSC」欄を見ます。「Start when VRChat runs」がONになっていれば、VRChatが起動していると自動で送信が始まります — 何も押す必要はありません。
- 表示が「OSC Activity Running」になっていれば、このステップは完了です(STEP 3の2枚目のスクショの右下がその状態)
- 「OSC Activity Off」のままなら、Start ボタンを押してください
「Start when VRChat runs」はONのままにしておくのがおすすめです。次回からはVRChatを起動するだけで、全部自動でつながります。
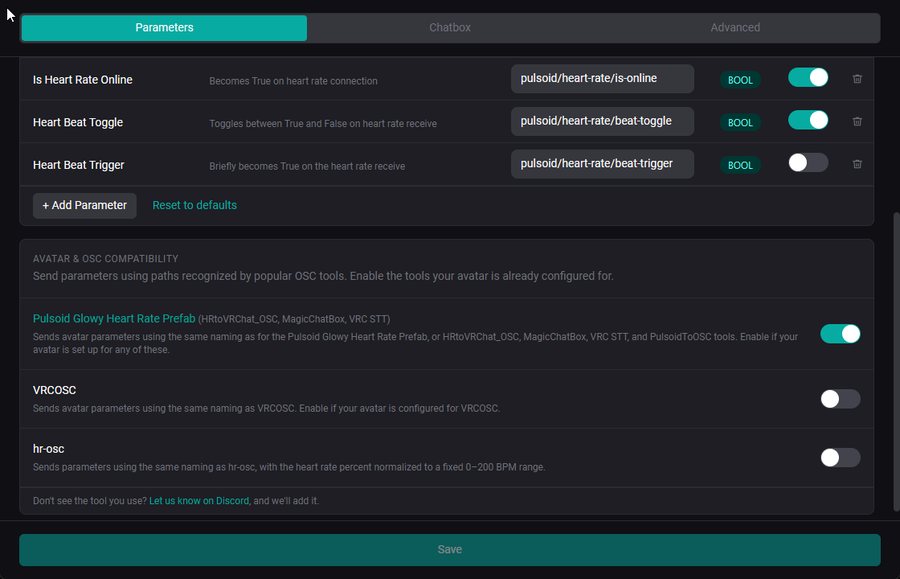
あわせて「Customize」も開いて、送信形式を確認しておくと確実です。下のほうの「Avatar & OSC Compatibility」で、「Pulsoid Glowy Heart Rate Prefab」がONになっているか見てください。ONでなければ、ここをONにして Save を押します。
「VRCOSC」の方をONにしても大丈夫です。PIXEL PULSEは両方の形式に対応しているので、どちらかがONになっていれば動きます。
Look at the “VRChat OSC” panel on the right of Pulsoid Desktop. If “Start when VRChat runs” is ON, sending starts automatically while VRChat is running — nothing to press.
- If it says “OSC Activity Running”, this step is done (see the bottom-right of the second screenshot in STEP 3)
- If it still says “OSC Activity Off”, press Start
Keep “Start when VRChat runs” ON — from now on, just launching VRChat connects everything automatically.
It is worth opening “Customize” as well to check the sending format. Scroll down to “Avatar & OSC Compatibility” and make sure “Pulsoid Glowy Heart Rate Prefab” is ON. If it is not, switch it on and press Save.
Turning on “VRCOSC” instead is fine too. PIXEL PULSE supports both formats, so either one being ON is enough.
5VRChat側でOSCを有効にするEnable OSC in VRChat
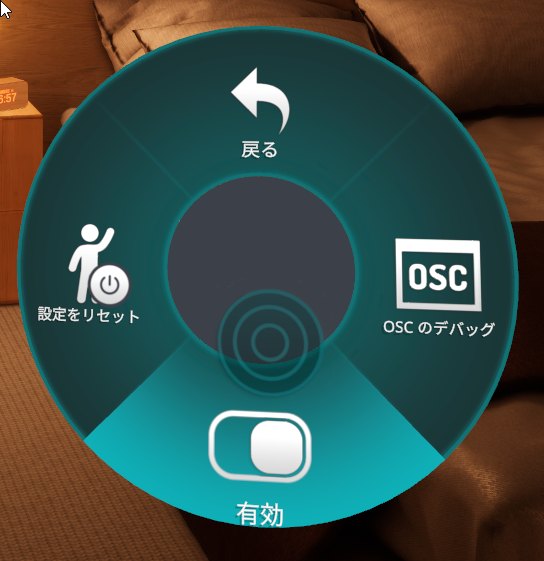
VRChatの中で、アクションメニュー(Rボタン/右スティック押し込み等)→ Options → OSC → 有効 をONにします。最初の1回だけでOKです。
In VRChat, open the Action Menu → Options → OSC → Enabled and turn it ON. You only need to do this once.
6できあがりDone!
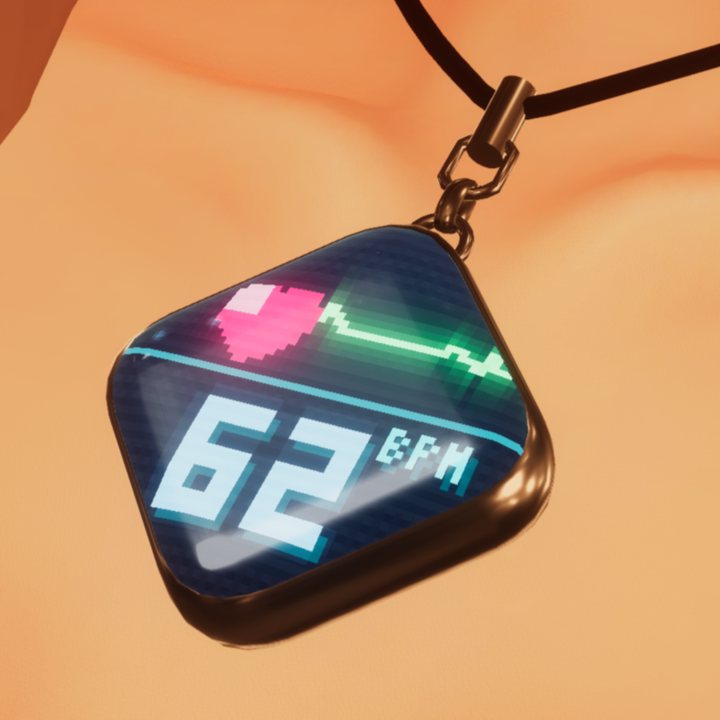
心拍が届き始めると、ペンダントは自動で心拍ページに切り替わります。胸元で数字が動いていたら完成です。
As soon as heart rate arrives, the pendant switches to the heart rate page automatically. If the number on your chest is moving — you're done.
?うまくいかないときIf it doesn't work
- Pulsoid Desktopに数字が出ていない → 心拍計の装着・電池・Bluetoothを確認。まずはここに数字が出るのが先です
- Desktopには出るのにペンダントに出ない → STEP 5のOSC有効を確認。それでもダメなら、同じ画面の「設定をリセット(Reset Config)」を押してアバターを選び直してください
- それでもダメ → VRChat OSC の「Customize」→「Avatar & OSC Compatibility」で「Pulsoid Glowy Heart Rate Prefab」か「VRCOSC」のどちらかがONか確認してください(両方OFFだと、ペンダントが読むパラメータが送られません)
- もっと詳しく → 導入ガイドのよくある質問
- No number in Pulsoid Desktop → check that the monitor is worn properly, charged, and Bluetooth is on. Numbers must appear here first
- Desktop shows numbers but the pendant doesn't → check OSC is enabled (STEP 5). If it still fails, press “Reset Config” on the same OSC page and re-select your avatar
- Still nothing → open “Customize” in the VRChat OSC panel → “Avatar & OSC Compatibility” and make sure either “Pulsoid Glowy Heart Rate Prefab” or “VRCOSC” is ON (with both off, the parameters the pendant reads are never sent)
- More details → the FAQ in the main guide